Transferring your FreePages site to YOUR Computer Using Filezilla
Step One: Create a new folder under your My Documents folder called My Webs. If you do not know how to do this you can follow these instructions OR you can use Windows Explorer to navigate to your Documents folder. When there, click on create New Folder, then rename that, e.g. My Webs, My Web Sites or My Web Pages.
Step Two: Download and install Filezilla to your computer. NOTE: You can also use Quick Connect BUT you can have different custom settings in the site manager that you cannot do in the Quick Connect. .
Step Three: Configure Filezilla following these instructions. Click on any thumbnail for a larger image.
GENERAL TAB:
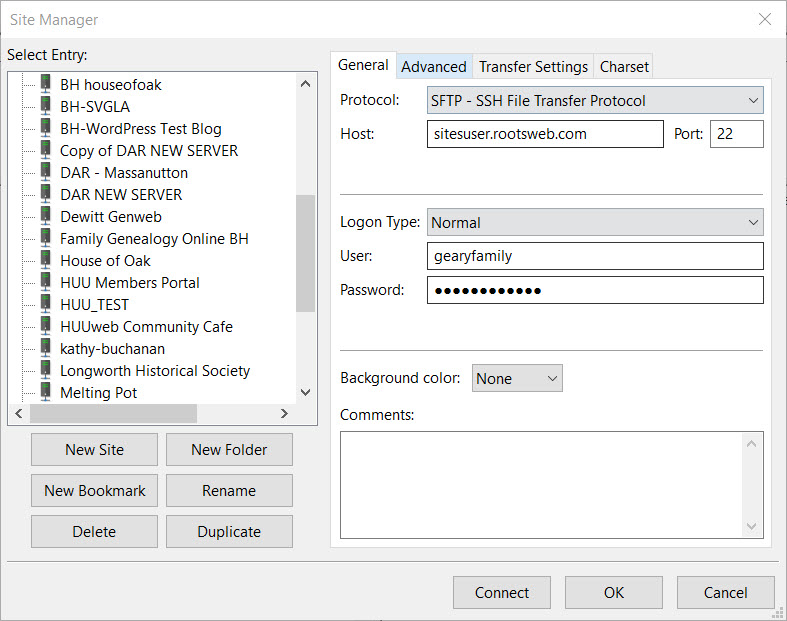
- Protocol - SFTP - SSH File Tranfer Protocol
- Host - sftp://sitesuser.rootsweb.com
- Port: 22
- Logon type: Ask for Password
- Username: from your RootsWeb welcome letter
- Password: You should have requested a NEW password that will be different from your original one. Since your password is case sensitive, you may want to use copy and paste to make sure that you don't mistype it.
- Comments: Add details if you want
ADVANCED TAB:
- Server Type : Autodetect
- Default Local Directory: click on the Browse button and navigate to the My Webs folder that you have just created.
- Default Remote Directory: leave blank. NOTE:
If you try to enter a remote directory, you will get an Invalid Data
message.


Screenshot Advanced screen for transferring contents of one community (genealogy_html) to your computer

TRANSFER SETTINGS:
- Leave Blank.
CHARSET TAB:
- Autodetect
Step Four: Provided you have completed the set-up as described, on clicking the Connect button you will be asked to enter your password.
You will see your Local folder contents in one pane and the Remote contents in the other pane.
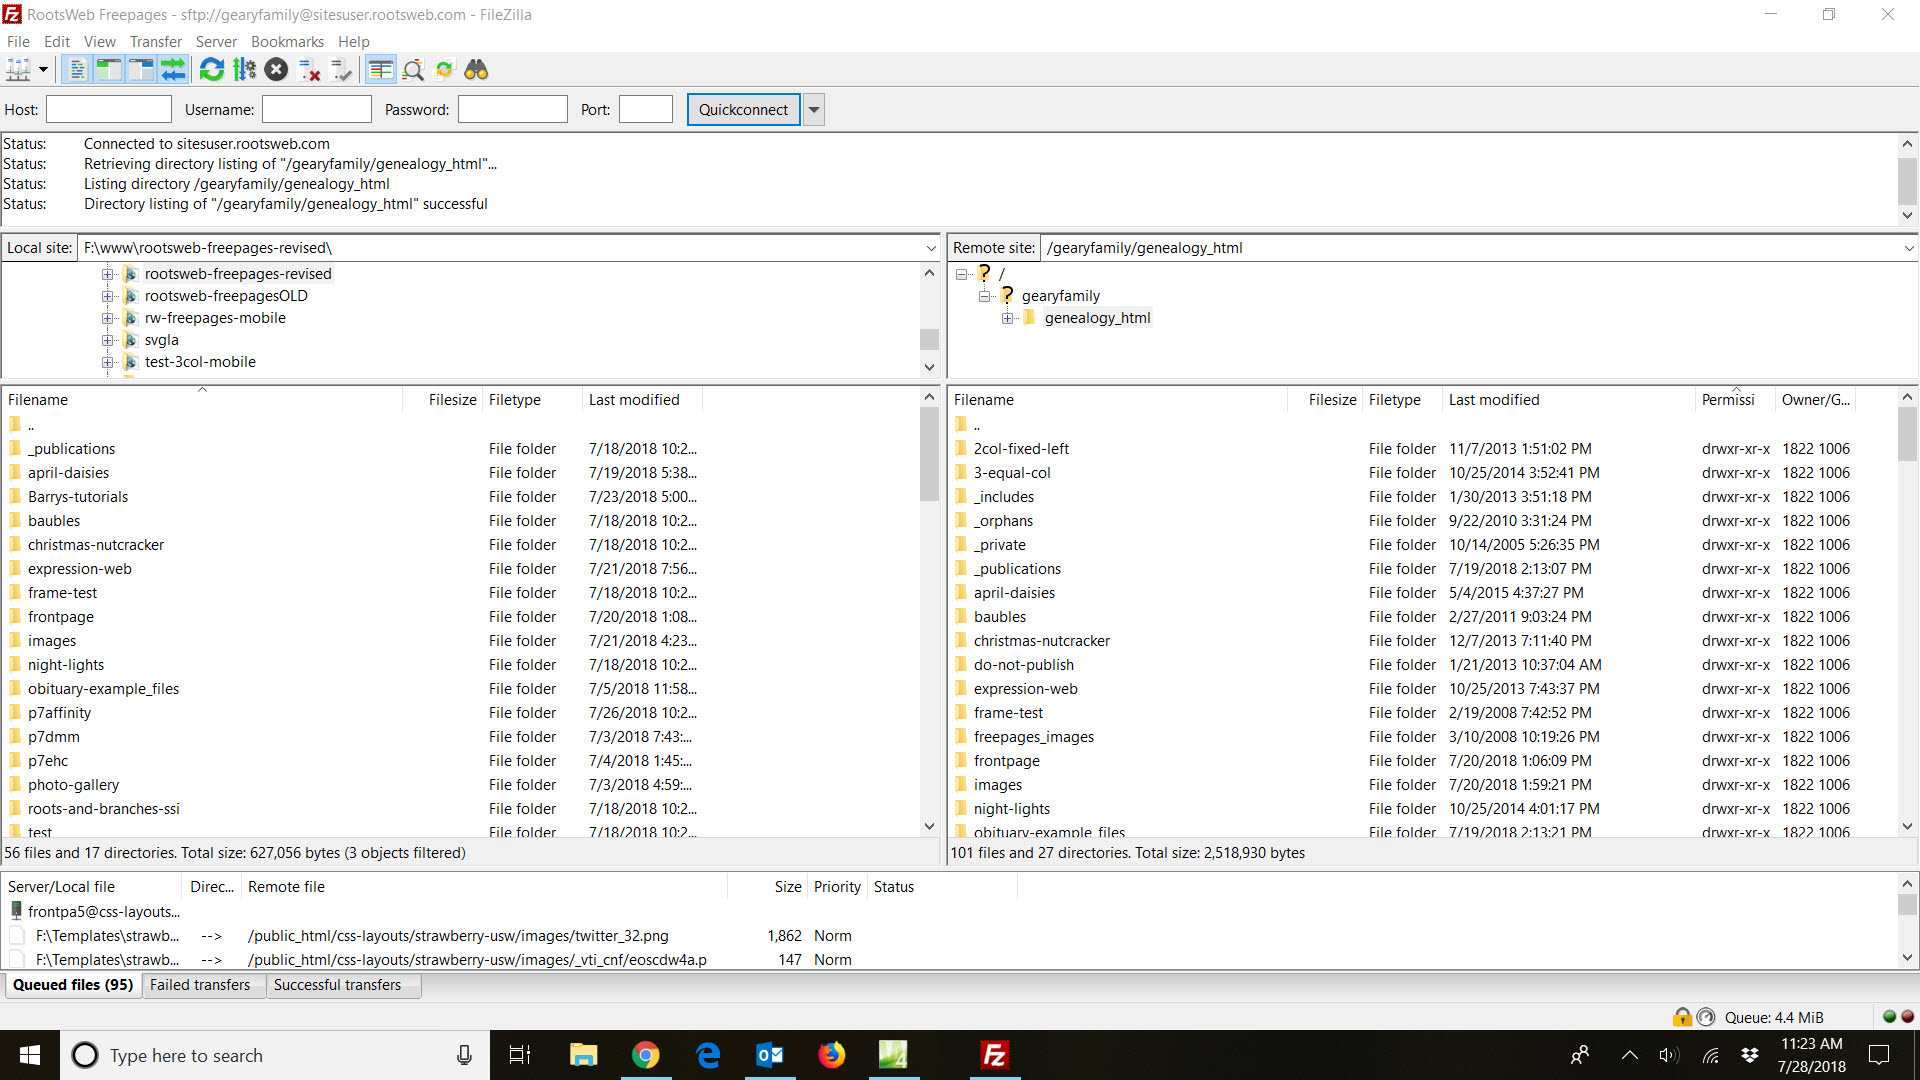
At this point, you are NOT deleting any files on the website if you download them. You are going to replicate those files in the My Web Sites folder on YOUR computer. In the top section of the Remote directory you will see your site name, and in the Remote directory bottom section you will see directories that currently make up your site.
The first entry in the Remote directory bottom section is a folder symbol with 2 dots after it; ignore it, as it is the link back to your root directory
Likewise, looking at your Local directory you will see a similar folder symbol, but nothing else.
Now, look over to the Remote directory and click on the first directory 'beneath' the folder symbol with the 2 dots. This will highlight the line. Right click on the highlighted line and and select Download.
That directory will download to you computer, and when downloaded will show in your Local (My Web Sites) folder. Highlight and download each of the directories that contain your RootsWeb sites. It may be only one (genealogy_html) but each of the folder/directories can contain an entirely separate site.
It may take some time if your connection is a dial-up, but if on an optical broadband connection it could be all done in a few minutes - or much less depending on the size of your site.
IMPORTANT NOTE: If you are using more than one community, you will need to do this for EACH community.
You now have your entire site or sites on YOUR computer.
DO NOT delete the unused folders (family_html, history_html, etc.). They are part of your account and structure and deleting them can corrupt your account.
Revised & Updated: July 19, 2018


